A Broadcast is a one-time email sent to a specific list or segment (like a newsletter or a flash sale). In Onyx, this is the quickest way to reach your audience instantly.
1. Start Your Campaign
To begin, you need to initiate a new campaign from your dashboard.
- The Path: Log into Onyx and click on Send and then Broadcasts in the main navigation.
- Selection: Click the Create Broadcast V2 (or Standard Campaign) as your campaign type.
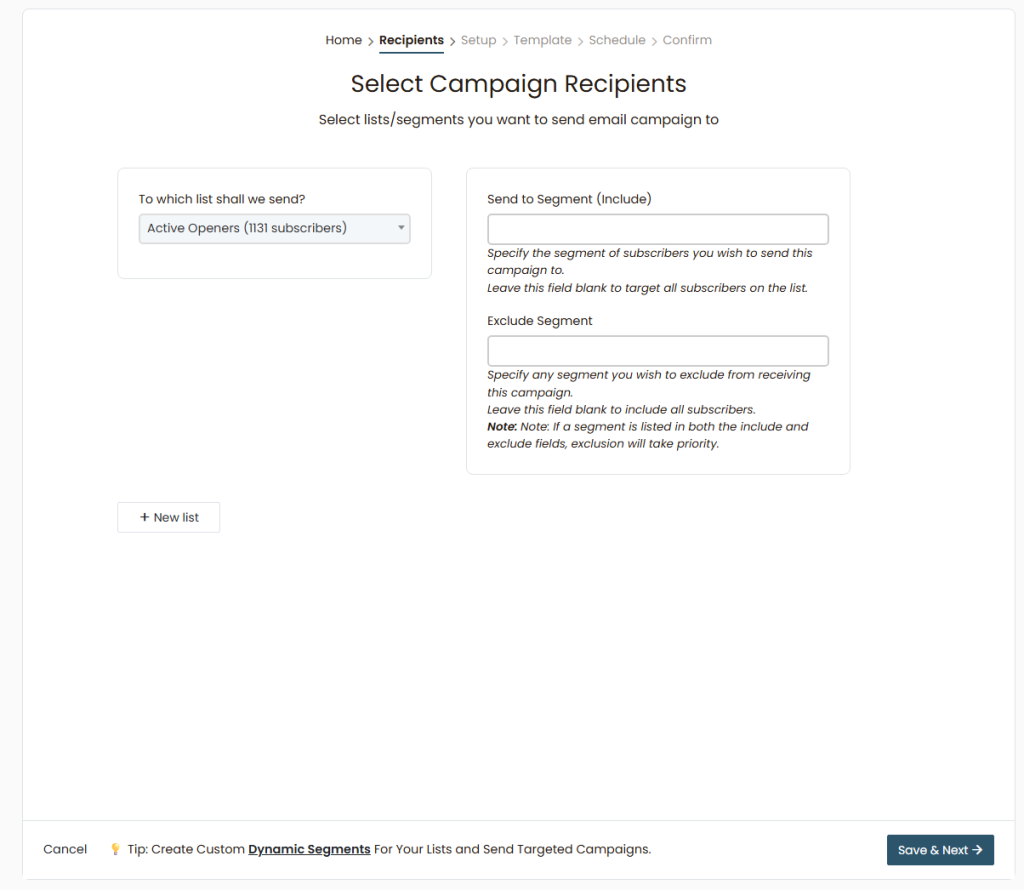
2. Define Your Audience
Onyx will ask you who you want to send this email to. You can select one entire list or use segments to target specific people based on their interests or behavior.
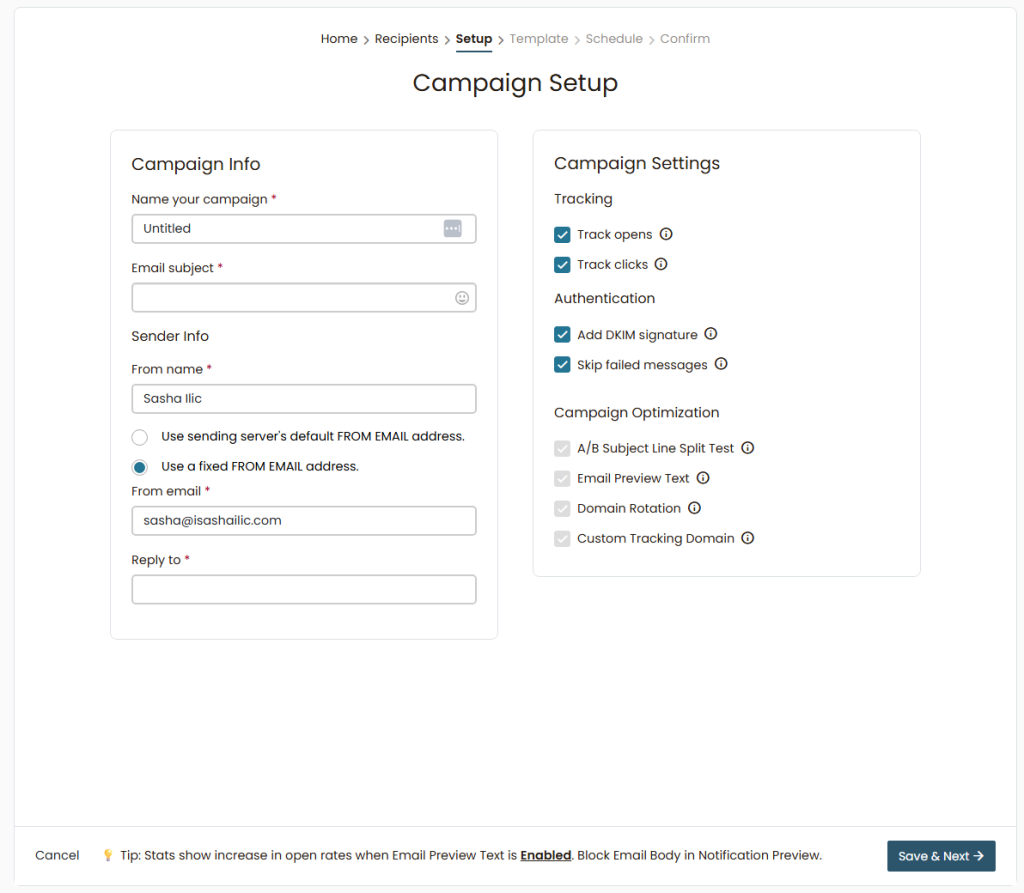
3. Add Necessary Information and Set Up Your Campaign
After selecting your recipients, you will enter the Setup phase. This is where you configure the identity of your email and how Onyx tracks its success.
- Campaign Info: Enter a internal name for your campaign and your Email Subject. This is the first thing your subscribers will see, so make it catchy.
- Sender Info: Ensure your “From name” and “From email” are professional. Using a fixed FROM email address (like your business domain) helps with brand recognition.
- Tracking: By default, Onyx enables Track opens and Track clicks. Keep these on so you can actually see your results in the Reports section later.
4. Customizing the Template
Once you select a starting point, you will enter the HTML email builder. Here you can drag and drop elements to customize the content exactly how you want it.
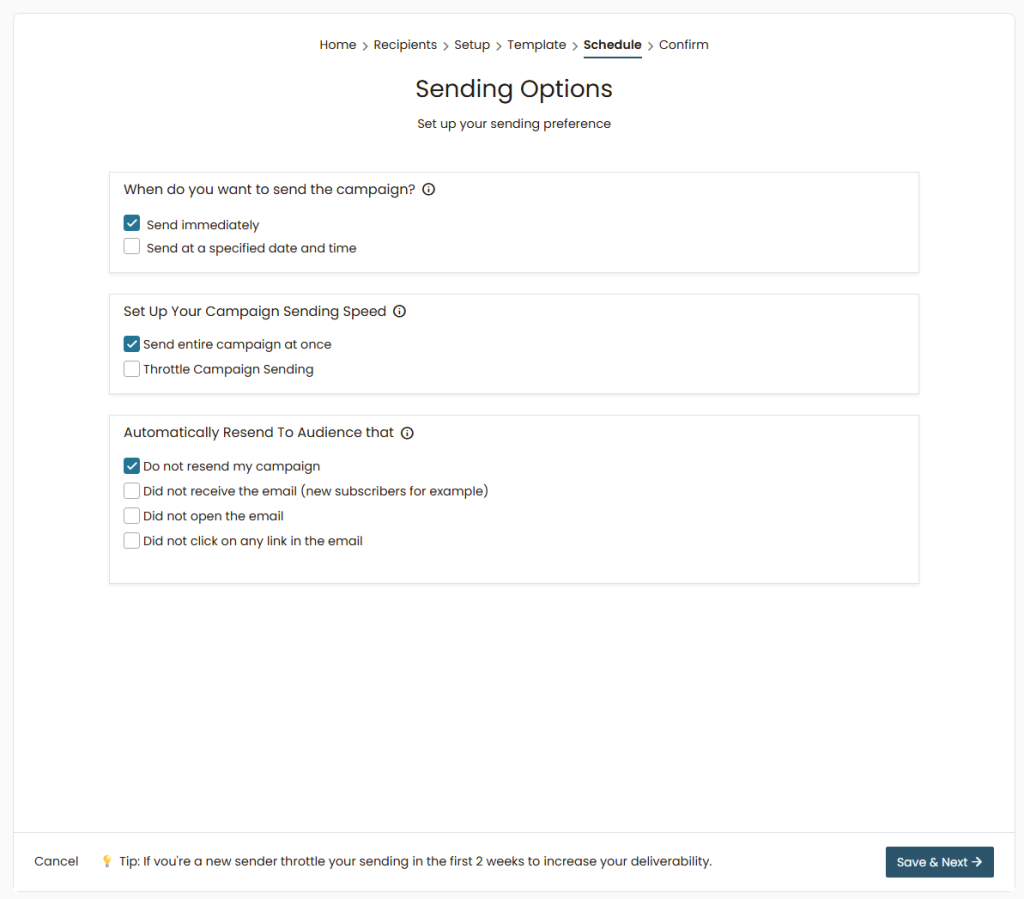
4. Configuring Sending Options
After designing your template, you will arrive at the Schedule step. This is where you define exactly when and how your campaign will be delivered to your audience.
Automatic Resend: You can configure the system to automatically resend the email to those who didn’t open it or didn’t click a link, significantly boosting your overall reach.
Timing: You can choose to fire the campaign immediately (Send immediately) or schedule it for a specific date and time in the future (Send at a specified date and time).
Sending Speed: Onyx allows you to use Throttle Campaign Sending. This is essential for controlling the delivery speed (e.g., sending 500 emails per hour) to protect your domain reputation.
5. Final Confirmation
The last step is Confirm. Here, Onyx provides a comprehensive checklist of all previous steps (Recipients, Setup, Template, and Schedule). If everything has a green checkmark, you are good to go. Once you click the final send button, your campaign is officially live.